Friday, October 9, 2015
Floating Teapots!
We have been studing ways to simulate water effects for compositing into live video. Here are some results from the last 2 classes. These are reflection only (no transparent water) effects.


Friday, July 20, 2012
NEW CLASS
The new video special effects class starts soon! In this 6 week session we will learn now to add smoke and fire particle effects to live video. I will post some examples and more details about the class over the next couple of weeks. So please check back later.
--------------------------------O--------------------------------
Here is the class advertisement that appears in the Fall 2012 issue of "Duluth Life" (the quarterly advertisement for classes hosted by Duluth Parks and Recreation).

Create Movie Special Effects
Learn how to create
your own movie special effects using Autodesk 3DS Max software. A 30-day demo
software version will be provided for free.
No experience required. Please
bring your own laptop. This is a free
class. The class meets each
Thursday from 6-8PM at Bunten Park in Duluth Georgia. The class lasts for 6 weeks starting the week of Nov 8.
Saturday, July 10, 2010
HERE'S MY FIRST CUT AT APPLYING MATERIALS TO THE SCENE
Hey guys,
I took the scene file that I sent to you yesterday. And, I applied my own materials to the various objects in the scene. I changed the framed picture in the scene to one that I like better. Somehow, having the Umbrella Corp. symbol on my wall seems more 'homey' :-) Here's my finished render.

Click here to download the zip of my finished 3DS Max file of this scene. If you haven't started yet, feel free to start with this one if you want and just change the various materials that I created. Keep working on your final render so you can show it off in our next class. I'll bring a photo printer so that you can print your finished rendering.
Russ
I took the scene file that I sent to you yesterday. And, I applied my own materials to the various objects in the scene. I changed the framed picture in the scene to one that I like better. Somehow, having the Umbrella Corp. symbol on my wall seems more 'homey' :-) Here's my finished render.

[Credits: As I mentioned before, I downloaded this free scene file and the tutorial from here: http://www.evermotion.org/tutorials_old/mich/minterior01.htm We are using this in our class to practice applying our own architectural materials for the Mental Ray renderer.]
Click here to download the zip of my finished 3DS Max file of this scene. If you haven't started yet, feel free to start with this one if you want and just change the various materials that I created. Keep working on your final render so you can show it off in our next class. I'll bring a photo printer so that you can print your finished rendering.
Russ
Friday, July 9, 2010
MAKING MATERIALS FOR AN INTERIOR ROOM SCENE
Hi Everybody,
In our class yesterday, we reviewed how to make several kinds of materials and textures in 3D Studio Max. And we reviewed some basic techniques for applying them to your 3D models.
• Using the “UVW Map” modifier to adjust the size and
position of a texture JPG on a model.
• Using the “Multi/Sub-object” material type to apply two
materials to the same object.
• Using “Bump-maps” to give a 3D bumpiness to a model’s
surface.

In yesterday’s class we also looked at a tutorial that I downloaded from here:
http://www.evermotion.org/tutorials_old/mich/minterior01.htm
We’re going to use the free download scene file from that tutorial to practice our material-making skills! I downloaded the interior room scene file that goes with that tutorial and passed it out to you in class. Since it uses the “Vray” renderer, I told you that I would convert it to the “Mental Ray” renderer that we are using in class and send you an email link to download it. So, here it is! Click this link to download my zip file that contains the converted 3D Studio Max file:
DOWNLOAD THE SCENE FILE HERE
Basically, all that I did was replace all the materials with the standard off-white color material and swap out the Vray lights for mental ray lights. So, everything has a plain off-white material applied to it. When you render the scene file “minterior_convert2mr_02.max”, it will look like this:
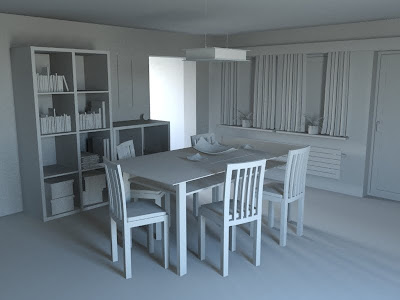
So, this week, try creating materials for each object using all the techniques we learned in the last class. All the texture (JPEG) files that you need are in the “textures” direction in the zip file. And, you can follow the tutorial for making some of the textures too. I made a PDF copy of the tutorial that is also in the zip file. When you’re done making all the materials in the scene, your scene will render something like this:

See what you can do. Feel free to pick your own colors/textures and replace furniture models. I’ll send another email this week as I also work through this tutorial. Next week I’ll show you how to adjust the window sunlight, how to tweak the interior lighting, and how to get the exterior window view that’s shown in the above picture. See you next week!
Russ
In our class yesterday, we reviewed how to make several kinds of materials and textures in 3D Studio Max. And we reviewed some basic techniques for applying them to your 3D models.
• Using the “UVW Map” modifier to adjust the size and
position of a texture JPG on a model.
• Using the “Multi/Sub-object” material type to apply two
materials to the same object.
• Using “Bump-maps” to give a 3D bumpiness to a model’s
surface.

In yesterday’s class we also looked at a tutorial that I downloaded from here:
http://www.evermotion.org/tutorials_old/mich/minterior01.htm
We’re going to use the free download scene file from that tutorial to practice our material-making skills! I downloaded the interior room scene file that goes with that tutorial and passed it out to you in class. Since it uses the “Vray” renderer, I told you that I would convert it to the “Mental Ray” renderer that we are using in class and send you an email link to download it. So, here it is! Click this link to download my zip file that contains the converted 3D Studio Max file:
DOWNLOAD THE SCENE FILE HERE
Basically, all that I did was replace all the materials with the standard off-white color material and swap out the Vray lights for mental ray lights. So, everything has a plain off-white material applied to it. When you render the scene file “minterior_convert2mr_02.max”, it will look like this:
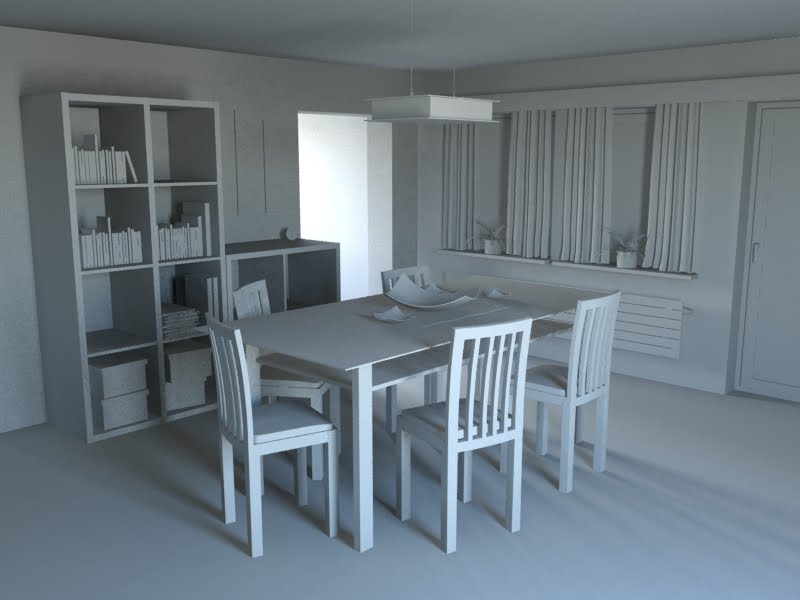
So, this week, try creating materials for each object using all the techniques we learned in the last class. All the texture (JPEG) files that you need are in the “textures” direction in the zip file. And, you can follow the tutorial for making some of the textures too. I made a PDF copy of the tutorial that is also in the zip file. When you’re done making all the materials in the scene, your scene will render something like this:

See what you can do. Feel free to pick your own colors/textures and replace furniture models. I’ll send another email this week as I also work through this tutorial. Next week I’ll show you how to adjust the window sunlight, how to tweak the interior lighting, and how to get the exterior window view that’s shown in the above picture. See you next week!
Russ
MODELING AND LIGHTING AN INTERIOR ROOM SCENE
In one of our previous classes, we practiced using various modeling techniques to make furniture and lamps for our interior scene. And, we looked at various ways to make lighting for lamps and exterior sunlight for our interior scene. Here are some renders that we did in class.


Thursday, July 8, 2010
CLOTH SIMULATIONS IN 3DS MAX
3D Studio Max contains tools for creating models and animation involving fabrics. One of the tools is called the "cloth modifier".
Students in the last class made these cloth simulation movies.
Click here to download and view full-screen.
Click here to download and view full-screen.
Click here to download and view full-screen.
Click here to download and view full-screen.
Students in the last class made these cloth simulation movies.
Click here to download and view full-screen.
Click here to download and view full-screen.
Click here to download and view full-screen.
Click here to download and view full-screen.
I know, I know. That last movie frame looks like a headless blue smurf wearing a wrinkled red t-shirt and waving his arms. I should have chosen a better fabric like “iron free polyester” instead of “cotton”. :-)
Thursday, June 17, 2010
NEW CLASS: 3D INTERIOR ARCHITECTURAL RENDERING
A NEW CLASS ON INTERIOR ARCHITECTURAL RENDERING...
Our next class session for the 3D Animation Special Effects class just started last week. Last week, students in that class voted to do an Interior Architectural Rendering project using 3D Studio Max and the Mental Ray renderer. We'll use 3D Studio Max to model a room, furniture, interior lighting, and materials. We use the 3D Studio Max "cloth" feature. And, we'll practice using Mental Ray "Final Gather" advanced rendering settings for interior lighting. As always, classes are free to anyone with an interest and a laptop that you can bring to class. You can follow our progress for this class here on this web site.THE XNA VIDEO GAME CLASS
The last 3D Animation class (the May-June 2010 3D Animation Video Games class) is just finishing now. You can check out what's happening in that class here: http://xnagamers.blogspot.com/ and here: http://3drobots.blogspot.com/. Our class project for that class was to write a multi-player network 3D video game using Microsoft's XNA gaming library and 3D Studio Max. We decided to start a new "Team Blog" web site so that everyone in the class could post content to the blogger web site. We're just about finished with the completed video game and the class. Of course, a software project like this is never "completed". There are endless great ideas and cool features to add. But, I'll post our latest XNA game installation file and the source code on that site in a week or two.
Subscribe to:
Posts (Atom)